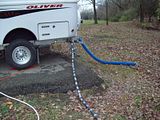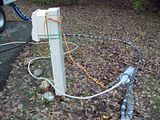

We purchased duct tape, 4' sticks of 1" inside diameter foam insulation and a heat tape to go inside next to the water hose. The heat tape stays plugged in all of the time and comes on at 38*, to keep the hose from freezing up. Since the water stays on all of the time at the freeze proof faucet, it defeats the freeze proof feature, so we wrapped it along with the hose in adhesive foil backed foam tape. The next step, should this prove not to be sufficient, will be to place a large cheap plastic trash can over the faucet and place tent stakes through the trash can lip to keep the wind from blowing it away. This will provide rain protection, dead air insulation and give a place to coil up our extra hose while keeping it hooked up for ready use.


1 comment:
Wow.. it must get a lot colder down that side of the street.. it only got down to 33.5 on this end according to our little weather station :D
Our winterizing solution is opting for just topping off the water tank when its not freezing out, emptying the hose and storing it in the truck. With the showers just around the corner, we figure we won't need much water actually at the camp site. (But it still feels indulgent to us.. as we're used to making the tank last 1-2 weeks at a time.)
Post a Comment